Haha awesome! XD
He is the boy Conan was jealous of, isn't he?
sonoci's drawings and such
-
breva

Posts: 912
-
Paix672
Posts: 251
Re: sonoci's drawings and such
Awesomeness XDsonoci wrote:Spoiler: PaddleBa

-
redangelran

- inlove with a mystery geek || is stalking someone
Posts: 1530
Re: sonoci's drawings and such
Paix672 wrote:Awesomeness XDsonoci wrote:Spoiler: PaddleBa
i. LOVE. iT !!!
"I don't mind waiting for people. Because the longer you wait, when you do meet, you'll be more happy."
-Mouri Ran
"Is a reason necessary? I don't know why you would kill someone but as for saving someone-- a logical mind isn't needed, right?"
-Kudo Shinichi
My Twitter||My MAL
-super stupid case fanatic, i'm waiting for you ♥-
-Mouri Ran
"Is a reason necessary? I don't know why you would kill someone but as for saving someone-- a logical mind isn't needed, right?"
-Kudo Shinichi
My Twitter||My MAL
-super stupid case fanatic, i'm waiting for you ♥-
-
sonoci

- Everyone's Child
Posts: 1548
Re: sonoci's drawings and such
Glad you guys are liking PaddleBa xD
Anyway, I came on here to say I'VE FINISHED THE MANGA COLORING TUTORIAL. However, I have to get all the pictures to png file type and then upload them to photobucket and THEN post the pics and instructions here...
Needless to say, my next post (or possibly POSTS O.O) is (/are) going to be LOOOOOOOOOOOONG
Watch for it!

-
sonoci
- Everyone's Child
Posts: 1548
Re: sonoci's drawings and such
I'm sad to say I'll be multi-posting, but I want to get this out!
I'll say this now:
UNTIL THE TUTORIAL IS POSTED COMPLETELY, PLEASE DO NOT POST. THANK YOU~
Without further ado...
Manga Coloring Tutorial
I have my own certain method of doing things that, while maybe not the most efficient, does give satisfactory results. I use PaintTool SAI, so there may be slightly different things than in Photoshop. NOTE: there may be very obvious things in here, but I put them in since it’d be better to overexplain than underexplain.
Linework
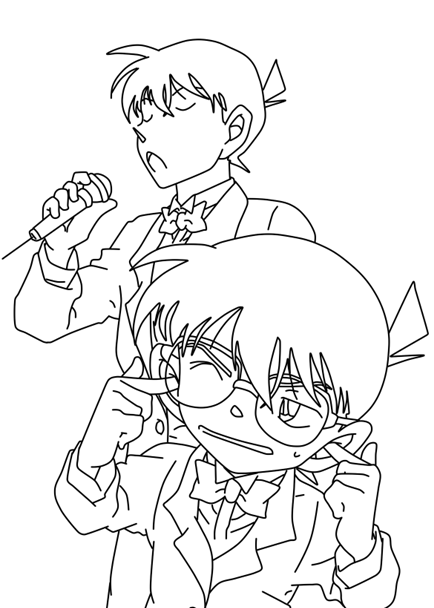
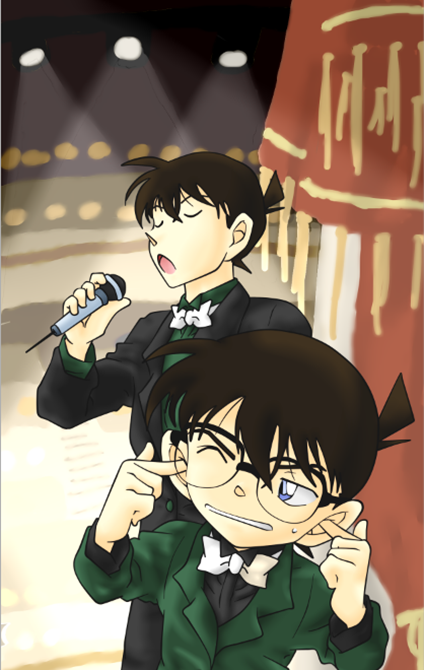
1. First you’ve got to get an image (redundancy is redundant!) like so:
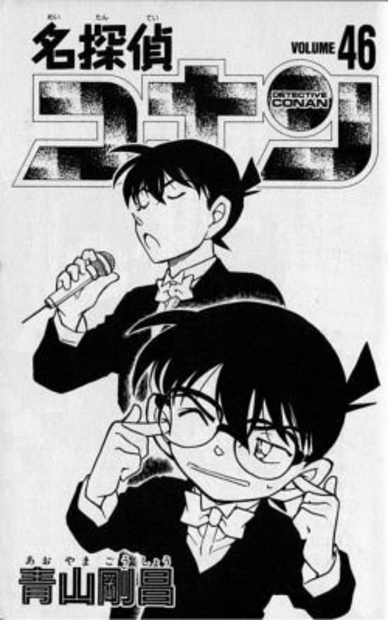
2. Next you’ve got to make sure it’s in a high resolution (as in, make it bigger, not find a big image). This will help to make it look clearer when you eventually shrink it down again.
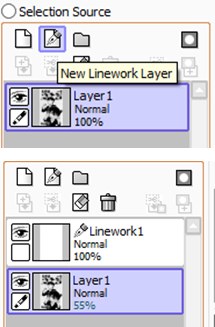
3. Once you do that, make a new linework layer and lower the transparency of the first layer.
4. Now, working on the linework layer, select the curve tool at about five width for the size (100%) I show here
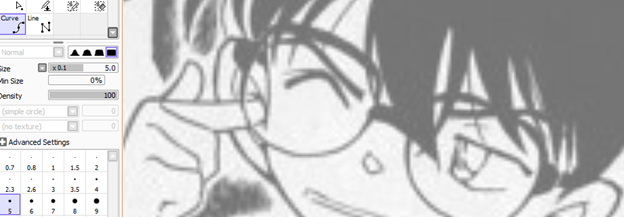
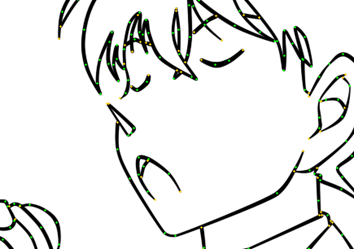
5. And...here it comes, you’re not gonna believe it...
BEGIN TRACING!
Yep, tracing. That’s how I do my manga coloring at least. I love to color in things, so yeah. As I warned, it is tedious, but it does have worthwhile results. Some portions require guessing, but it’s easy enough to get the hang of after a few tries.
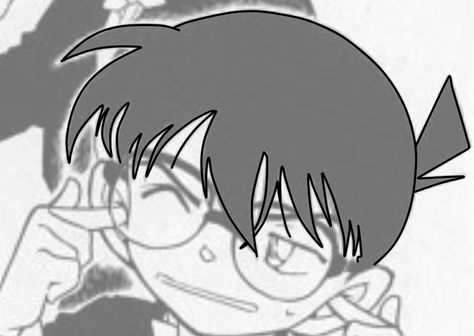
A note: if you want to see just your progress so far, you can just turn off the first layer and...
^You get this
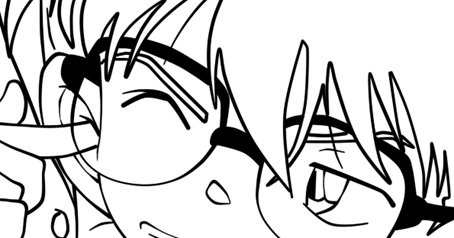
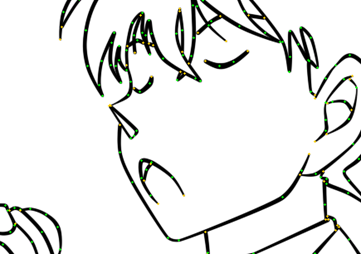
6. Once you’re finished, it should look something like the image below.
Now's an optional portion: basically fine-tuning if you will.
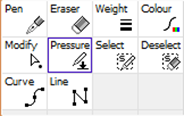
One of my favorites--the beloved pressure tool! Basically 100% is the normal setting. 100% will make it thicker. It’s hard to tell the difference without comparing, but when you do...
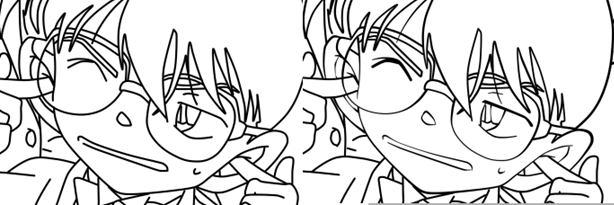
This is the result. His facial figures have been pressured and although not a big difference in the long run, it’s a nice touch I like to have for the works I do.
MORE TO COME
I'll say this now:
UNTIL THE TUTORIAL IS POSTED COMPLETELY, PLEASE DO NOT POST. THANK YOU~
Without further ado...
Manga Coloring Tutorial
I have my own certain method of doing things that, while maybe not the most efficient, does give satisfactory results. I use PaintTool SAI, so there may be slightly different things than in Photoshop. NOTE: there may be very obvious things in here, but I put them in since it’d be better to overexplain than underexplain.
Linework
1. First you’ve got to get an image (redundancy is redundant!) like so:
2. Next you’ve got to make sure it’s in a high resolution (as in, make it bigger, not find a big image). This will help to make it look clearer when you eventually shrink it down again.
3. Once you do that, make a new linework layer and lower the transparency of the first layer.
4. Now, working on the linework layer, select the curve tool at about five width for the size (100%) I show here
5. And...here it comes, you’re not gonna believe it...
BEGIN TRACING!
Yep, tracing. That’s how I do my manga coloring at least. I love to color in things, so yeah. As I warned, it is tedious, but it does have worthwhile results. Some portions require guessing, but it’s easy enough to get the hang of after a few tries.
A note: if you want to see just your progress so far, you can just turn off the first layer and...
^You get this
6. Once you’re finished, it should look something like the image below.
Now's an optional portion: basically fine-tuning if you will.
One of my favorites--the beloved pressure tool! Basically 100% is the normal setting. 100% will make it thicker. It’s hard to tell the difference without comparing, but when you do...
This is the result. His facial figures have been pressured and although not a big difference in the long run, it’s a nice touch I like to have for the works I do.
MORE TO COME
-
sonoci
- Everyone's Child
Posts: 1548
Re: sonoci's drawings and such
Coloring
1. Once you’re finished with that (if you did it at all) it’s finally time to start the coloring! Now, before I get to the step, I’ll say this: for those familiar with SAI this next move might not make much sense, but I have my reasons.
2. While selecting Layer1, make a new Normal layer so that it’s between Layer1 and Linework1. (for clarities sake, this will be ‘color’)

3. Keep the color layer here and its type as Normal.
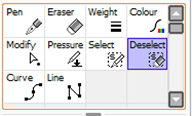
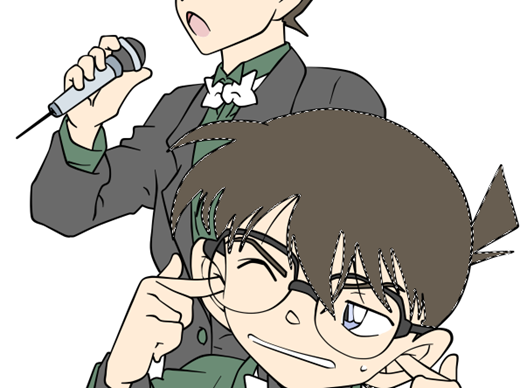
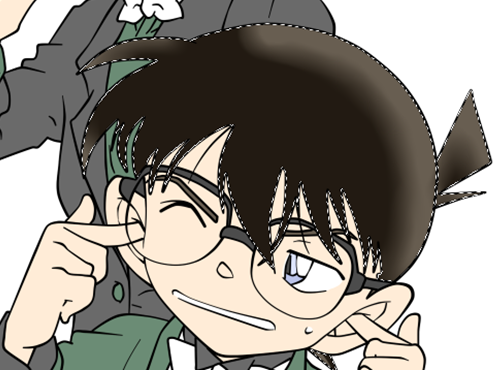
4. Select Linework1 and grab the magic wand. Make sure it’s set to ‘Transparency (Strict)' and ‘Working Layer’. Once that’s done, begin selecting.

5. Now it’s hard to tell in that picture, but often times even on strict Transparency there’ll be little white spaces where the selection didn’t reach. To fix this, just use the manual ‘brush’ select tool and fill in the white spaces. Once everything you want to color in with your current color (mine in this moment is black) just go to the color layer and...
Bucket that sucker!
6. At this point you rinse and repeat from 4 until you’ve got all the colors you want. (In the Color section)
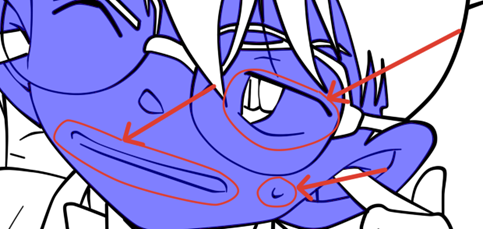
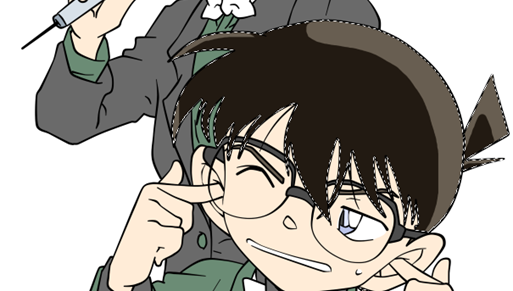
For smaller areas like Conan’s eyes, his mouth and the sweatdrop he has that bleed into his face, you can use the deselect ‘brush’ tool and deselect what you don’t want to color.
However, for things such as Shinichi’s nose that bleed into larger areas (in this case, the background) there’s a different trick.
You can go to the linework layer, hold Control while using either the pen, curve or line tools to make these round dots appear and…
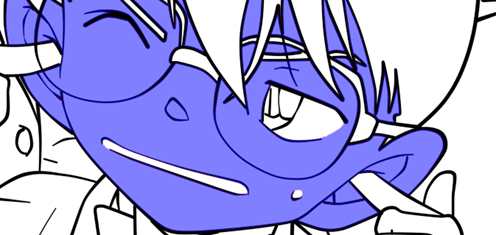
…temporarily move the line of his nose so you can select his face without worry. Once finished coloring areas like these, just move the line back to its original position.
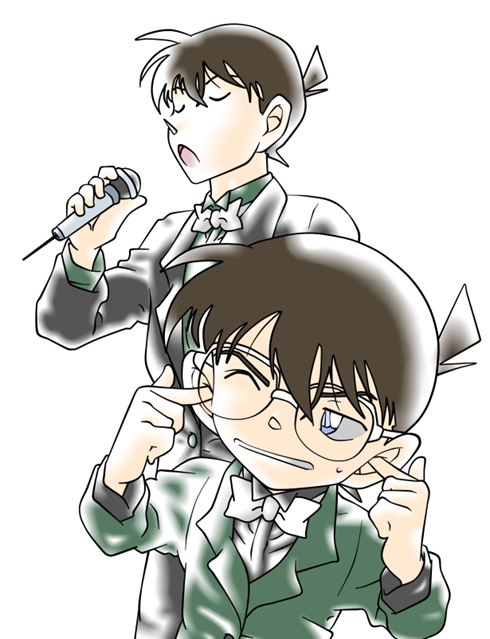
You could also...
Make sure you color the white parts too! In the end, you’ll have your picture colored. Like so:
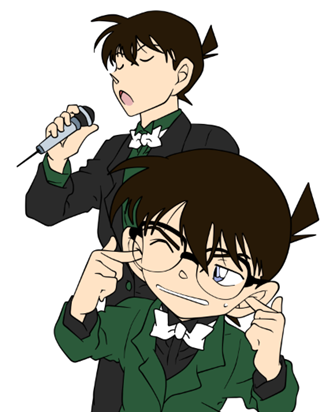
...Though hopefully you guys will have more sense on complementary colors than I do. @_@
MORE TO COME
1. Once you’re finished with that (if you did it at all) it’s finally time to start the coloring! Now, before I get to the step, I’ll say this: for those familiar with SAI this next move might not make much sense, but I have my reasons.
2. While selecting Layer1, make a new Normal layer so that it’s between Layer1 and Linework1. (for clarities sake, this will be ‘color’)
3. Keep the color layer here and its type as Normal.
4. Select Linework1 and grab the magic wand. Make sure it’s set to ‘Transparency (Strict)' and ‘Working Layer’. Once that’s done, begin selecting.
5. Now it’s hard to tell in that picture, but often times even on strict Transparency there’ll be little white spaces where the selection didn’t reach. To fix this, just use the manual ‘brush’ select tool and fill in the white spaces. Once everything you want to color in with your current color (mine in this moment is black) just go to the color layer and...
Bucket that sucker!
6. At this point you rinse and repeat from 4 until you’ve got all the colors you want. (In the Color section)
For smaller areas like Conan’s eyes, his mouth and the sweatdrop he has that bleed into his face, you can use the deselect ‘brush’ tool and deselect what you don’t want to color.
However, for things such as Shinichi’s nose that bleed into larger areas (in this case, the background) there’s a different trick.
You can go to the linework layer, hold Control while using either the pen, curve or line tools to make these round dots appear and…
…temporarily move the line of his nose so you can select his face without worry. Once finished coloring areas like these, just move the line back to its original position.
You could also...
tip courtesy of SoreiyuSoreiyu wrote: Instead of moving the vector layer lineart for the nose you could just use the selection tool to draw a blue line before filling in the area selection.
Make sure you color the white parts too! In the end, you’ll have your picture colored. Like so:
...Though hopefully you guys will have more sense on complementary colors than I do. @_@
MORE TO COME
Last edited by sonoci on July 1st, 2011, 6:07 pm, edited 1 time in total.
-
sonoci
- Everyone's Child
Posts: 1548
Re: sonoci's drawings and such
Background (short, optional, and uninformative!)
1. Normally shading would come here, but I’m going to do yet another sidetrack. However, if you choose to do this I highly recommend it right now, since it helps with lighting and shading in the long run. What am I talking about? A background.
2. Start by making a new Normal layer under color.

3. I called it ‘BG sketch’ because that’s what I’m going to do: sketch the BG. You don’t need a sketch if the background is simple, or even if it’s not, but I just want to.
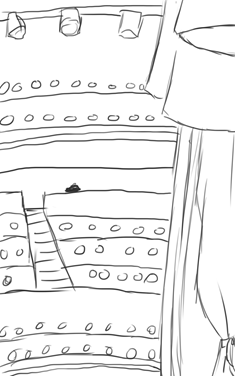
4. Important thing here: if you’re going to do a background, it’s a good idea to turn off the other layers first. The background will fill all the blank areas, so you want to make sure it fills the entire picture.
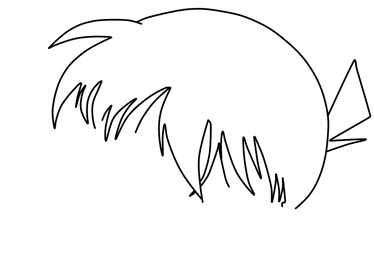
5. Now it may seem cheap, but the background is a whole ‘nother thing, so I won’t be touching on it much. Just know that once I was finished with the sketch layer I deleted it and the end result of the whole process was this:
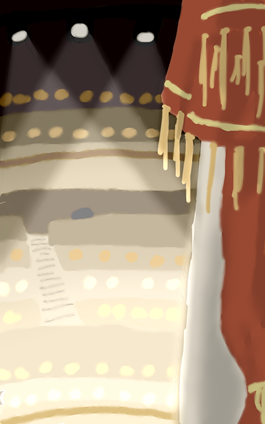
MORE TO COME
1. Normally shading would come here, but I’m going to do yet another sidetrack. However, if you choose to do this I highly recommend it right now, since it helps with lighting and shading in the long run. What am I talking about? A background.
2. Start by making a new Normal layer under color.
3. I called it ‘BG sketch’ because that’s what I’m going to do: sketch the BG. You don’t need a sketch if the background is simple, or even if it’s not, but I just want to.
4. Important thing here: if you’re going to do a background, it’s a good idea to turn off the other layers first. The background will fill all the blank areas, so you want to make sure it fills the entire picture.
5. Now it may seem cheap, but the background is a whole ‘nother thing, so I won’t be touching on it much. Just know that once I was finished with the sketch layer I deleted it and the end result of the whole process was this:
MORE TO COME
-
sonoci
- Everyone's Child
Posts: 1548
Re: sonoci's drawings and such
Shading
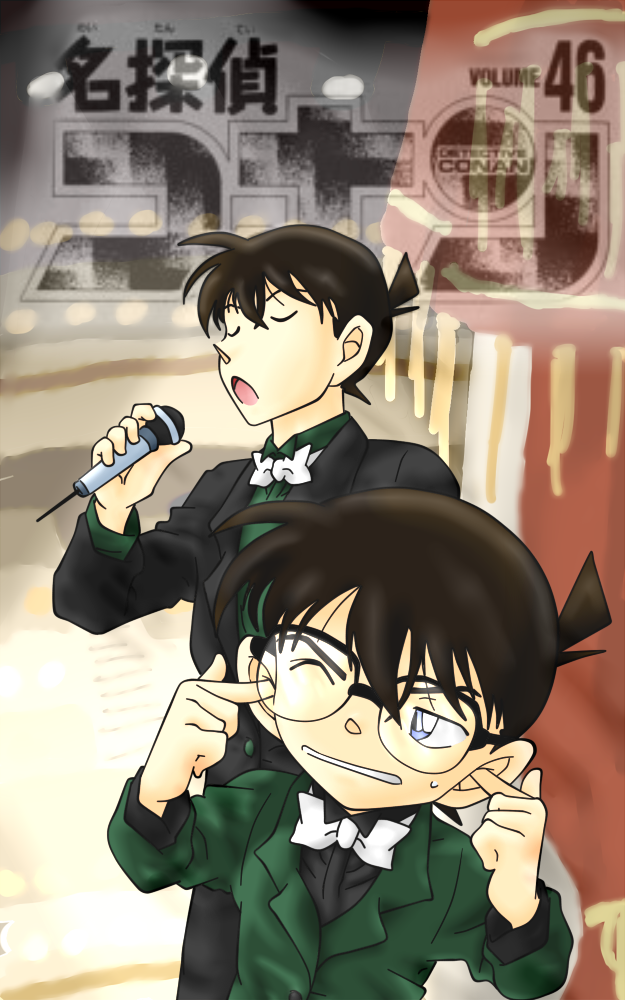
1. With the background finished, we now have a base for the shading. This background idea involves Conan and Shinichi on a rounded stage, so there’s actually a light I haven’t added, but that has to wait for later. However, I will tell you that it’s coming from the top left. So, with the knowledge that there’s a light coming from the top left and also lights coming from the background, let’s start shading.
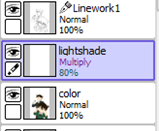
2. Make a new layer in the type ‘Multiply’ and put the transparency to about 80%. I say 80 since the lights are directly shining on the subjects of the image. To give the impression of light, the shadows are darker and harsher. I’m going to call this ‘lightshade’ as it’s the first of three.
3. Using the color layer and the ‘color difference’ option of the magic wand, you can now select any color you want easily without having to worry about the white spaces. With that in mind, I’ll use Conan’s hair as a first example.
4. (You can see that it looks a bit different here: that’s because I turned the BG layer off and lowered color’s transparency to see better). In this instance, lightshade will be the shadows that result from the back light (instead of minimum shade like I usually do). So, noticing the obstacles between the light and his hair (like Shinichi), we’ll use the hair’s own color to shade in on the layer. And...
5. There you go! If you like to cel-shade, you can stop here, but I personally like to add one other detail here. That’s to take the blur tool...
...and do this!
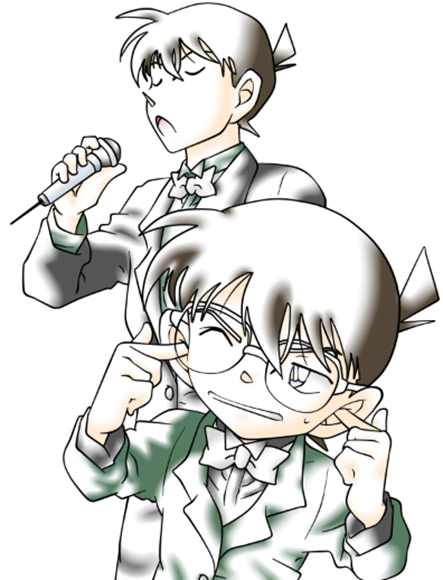
6. Continue on with the shading on this layer always keeping in mind where the light is coming from (in this case the back) until you’ve done all the colors (for white, just pick a gray that’s lighter than the color of Shinichi’s jacket you see above). Once you’re done it should look something like:
As you can notice, the color is turned off. This is just an easy way to keep track of where your shading is (since colors like brown and blackish get awfully dark).
You can also see that there are added folds only in the shading. This is a simple way to really get an image to pop and look more polished. Experiment with your shading!
7. Now, just like the lightshade layer, make another Multiply 80% called (or at least I call it) ‘medshade’. This layer, though usually for more detailed shading, is going to be for the shadows that result from the as of yet non-existent top left light.
8. First step is first: though not necessary, I’d turn off the lightshade layer since...well, it’ll just look weird, I’ll say that.
9. Let’s use Conan’s hair again. Now that the light is coming from the top left, Shinichi’s no longer in the way, so...

His hair is much lighter and the shadows are in much different places.
10. Basically you just repeat step 9, but with the top left light in mind rather than the one in the background. Eventually...
You'll get this!
11. Now, as I mentioned there were three sets in the way I shade, however, I very rarely use the last one: darkshade. This layer would be used for the minor, minor details. In this picture that’d just be making sure there were shadows in the general positions (in his ears, under the neck, etc). Since the two I’ve already used are 80% with fairly dark colors, I’m not going to use it. Just know it’s there. Though, do I really need it? Because, on their own, each of the shade layers look pretty good, right? ...What does that mean when they’re put together?
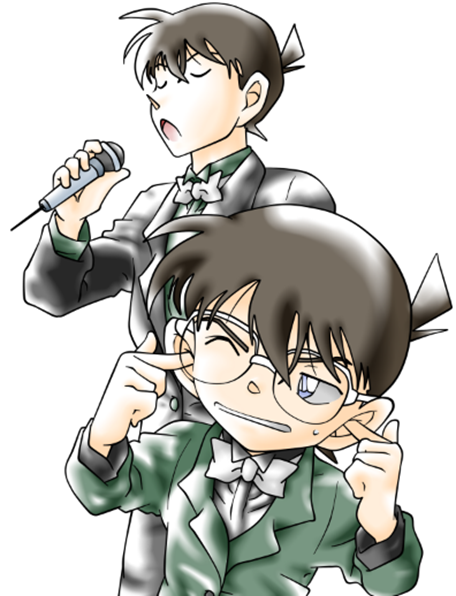
POP!
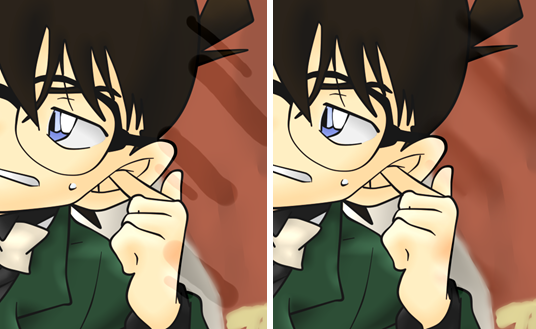
Using my method of shading, the amount of shading covering the subject should range from 25% to almost 75%. Around 25% for more direct light like below
...and almost 75% (or even over) for when the light is dim or shining from behind like below
MORE (AND LIKELY THE END) TO COME
1. With the background finished, we now have a base for the shading. This background idea involves Conan and Shinichi on a rounded stage, so there’s actually a light I haven’t added, but that has to wait for later. However, I will tell you that it’s coming from the top left. So, with the knowledge that there’s a light coming from the top left and also lights coming from the background, let’s start shading.
2. Make a new layer in the type ‘Multiply’ and put the transparency to about 80%. I say 80 since the lights are directly shining on the subjects of the image. To give the impression of light, the shadows are darker and harsher. I’m going to call this ‘lightshade’ as it’s the first of three.
3. Using the color layer and the ‘color difference’ option of the magic wand, you can now select any color you want easily without having to worry about the white spaces. With that in mind, I’ll use Conan’s hair as a first example.
4. (You can see that it looks a bit different here: that’s because I turned the BG layer off and lowered color’s transparency to see better). In this instance, lightshade will be the shadows that result from the back light (instead of minimum shade like I usually do). So, noticing the obstacles between the light and his hair (like Shinichi), we’ll use the hair’s own color to shade in on the layer. And...
5. There you go! If you like to cel-shade, you can stop here, but I personally like to add one other detail here. That’s to take the blur tool...
...and do this!
6. Continue on with the shading on this layer always keeping in mind where the light is coming from (in this case the back) until you’ve done all the colors (for white, just pick a gray that’s lighter than the color of Shinichi’s jacket you see above). Once you’re done it should look something like:
As you can notice, the color is turned off. This is just an easy way to keep track of where your shading is (since colors like brown and blackish get awfully dark).
You can also see that there are added folds only in the shading. This is a simple way to really get an image to pop and look more polished. Experiment with your shading!
7. Now, just like the lightshade layer, make another Multiply 80% called (or at least I call it) ‘medshade’. This layer, though usually for more detailed shading, is going to be for the shadows that result from the as of yet non-existent top left light.
8. First step is first: though not necessary, I’d turn off the lightshade layer since...well, it’ll just look weird, I’ll say that.
9. Let’s use Conan’s hair again. Now that the light is coming from the top left, Shinichi’s no longer in the way, so...
His hair is much lighter and the shadows are in much different places.
10. Basically you just repeat step 9, but with the top left light in mind rather than the one in the background. Eventually...
You'll get this!
11. Now, as I mentioned there were three sets in the way I shade, however, I very rarely use the last one: darkshade. This layer would be used for the minor, minor details. In this picture that’d just be making sure there were shadows in the general positions (in his ears, under the neck, etc). Since the two I’ve already used are 80% with fairly dark colors, I’m not going to use it. Just know it’s there. Though, do I really need it? Because, on their own, each of the shade layers look pretty good, right? ...What does that mean when they’re put together?
POP!
Using my method of shading, the amount of shading covering the subject should range from 25% to almost 75%. Around 25% for more direct light like below
...and almost 75% (or even over) for when the light is dim or shining from behind like below
MORE (AND LIKELY THE END) TO COME
Last edited by sonoci on July 1st, 2011, 5:49 pm, edited 1 time in total.
-
sonoci
- Everyone's Child
Posts: 1548
Re: sonoci's drawings and such
Lighting
1. It’s about time we finish up here, and that means lighting. First off, any layers turned off or lowered in transparency from their intended value, turn them back to normal. You need to in order to judge how light your picture currently is. When you do that, make a new layer in the Luminosity type and make your brush white.
2. There’ll be a few Luminosity layers here, so be warned. The first of these is just going to be a simple triangle over the two: a spotlight, just like the ones behind in the BG. You’ll notice that your brush makes the picture completely white. Don’t worry, just make the spotlight and after you’re finished, adjust the transparency to your liking, like below.
(It’s a bit hard to see, but that’s because it’s at 10% transparency. Yeah, Luminosity’s a powerful type of layer that way.)
3. For extra detail, erase some odd lines at the same angle of the light as shadows then blur. Like so:
4. Make another Luminosity layer, this time it’s for the highlights of their hair (and possibly other shiny things). Don’t worry about selecting either, you want it to glow! In this end, this layer was at 20% transparency. Don’t do Conan’s glasses, either! That’s for the last one...
5. Make one last Luminosity layer. Zoom into Conan’s glasses. Now, since only the top left light can hit his glasses, make the first glare come from that direction. The rest of the shine? Just like how we made the shadows above.
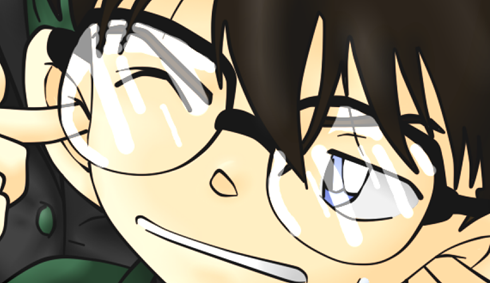
Just blur and...
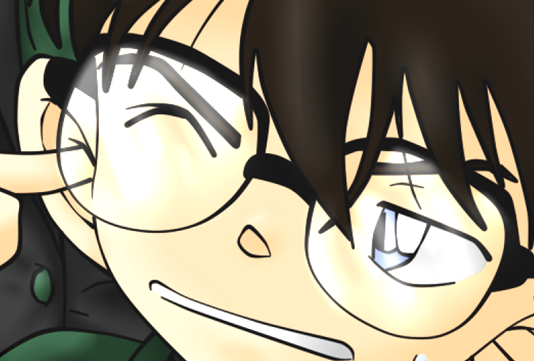
You’ve got shiny glasses! (which above are at 50%, I changed to 30%)
Hey.
Hey, wait a minute.
WE'RE FINISHED!~
I hope this is useful to somebody D: Otherwise I'll feel real bad because I wasted a crapton of space there :'(
1. It’s about time we finish up here, and that means lighting. First off, any layers turned off or lowered in transparency from their intended value, turn them back to normal. You need to in order to judge how light your picture currently is. When you do that, make a new layer in the Luminosity type and make your brush white.
2. There’ll be a few Luminosity layers here, so be warned. The first of these is just going to be a simple triangle over the two: a spotlight, just like the ones behind in the BG. You’ll notice that your brush makes the picture completely white. Don’t worry, just make the spotlight and after you’re finished, adjust the transparency to your liking, like below.
(It’s a bit hard to see, but that’s because it’s at 10% transparency. Yeah, Luminosity’s a powerful type of layer that way.)
3. For extra detail, erase some odd lines at the same angle of the light as shadows then blur. Like so:
4. Make another Luminosity layer, this time it’s for the highlights of their hair (and possibly other shiny things). Don’t worry about selecting either, you want it to glow! In this end, this layer was at 20% transparency. Don’t do Conan’s glasses, either! That’s for the last one...
5. Make one last Luminosity layer. Zoom into Conan’s glasses. Now, since only the top left light can hit his glasses, make the first glare come from that direction. The rest of the shine? Just like how we made the shadows above.
Just blur and...
You’ve got shiny glasses! (which above are at 50%, I changed to 30%)
Hey.
Hey, wait a minute.
Spoiler:
I hope this is useful to somebody D: Otherwise I'll feel real bad because I wasted a crapton of space there :'(
Last edited by sonoci on June 18th, 2011, 2:20 am, edited 1 time in total.
-
kirite

- Cookie-Eating Moderating Machine
- Chillin'
Posts: 1762- Contact:
Re: sonoci's drawings and such
OMG THIS TUTORIAL IS SO MUCH LOVE <333
You're the best sonoci-chan ^3^ <3333. This is so clear and easy to understand <3
*gives giant gold star*
I really love the background! Your composition is so awesome ;w;!
AND OMG it's the paddle made of naughty tree 8D!
You're the best sonoci-chan ^3^ <3333. This is so clear and easy to understand <3
*gives giant gold star*
I really love the background! Your composition is so awesome ;w;!
AND OMG it's the paddle made of naughty tree 8D!
Hey, I have an idea, let's have a THIS SUCKS / NO THIS SUCKS / NO YOU / NO YOU argument for a couple pages, that will really be great. - Ingmar
-
redangelran
- inlove with a mystery geek || is stalking someone
Posts: 1530
Re: sonoci's drawings and such
awesome!!! i gotta try this!! *starts finding PAINTTOOL SAI
"I don't mind waiting for people. Because the longer you wait, when you do meet, you'll be more happy."
-Mouri Ran
"Is a reason necessary? I don't know why you would kill someone but as for saving someone-- a logical mind isn't needed, right?"
-Kudo Shinichi
My Twitter||My MAL
-super stupid case fanatic, i'm waiting for you ♥-
-Mouri Ran
"Is a reason necessary? I don't know why you would kill someone but as for saving someone-- a logical mind isn't needed, right?"
-Kudo Shinichi
My Twitter||My MAL
-super stupid case fanatic, i'm waiting for you ♥-
-
breva
Posts: 912
Re: sonoci's drawings and such
Thank you sonoci!  *goes to try it*
@redangelran: I found this one, not sure if it works well though: Paint Tool SAI obtained from here
@redangelran: I found this one, not sure if it works well though: Paint Tool SAI obtained from here
-
KaitoGirl
- I can fail, but I will try again... 'til the end.
Posts: 1575
Re: sonoci's drawings and such
Amazing!! I will copy the tutorial and try it during vacations!
Do not be far from me, for trouble is near and there is no one to help me. Psalm 22:11
“Cursed is the one who trusts in man..." Part of Jeremiah 17:5
index.php?topic=4047.msg547789#new <-- My FanArt
“Cursed is the one who trusts in man..." Part of Jeremiah 17:5
index.php?topic=4047.msg547789#new <-- My FanArt
-
sonoci
- Everyone's Child
Posts: 1548
Re: sonoci's drawings and such
@kirite: Thanks! That's good to hear from you since I originally loved your tutorial xD I'm also glad it's easy to understand, that was something I worried about
@redangelran: It shouldn't be that hard to find...especially with breva's help
@KG: I look forward to seeing your creations
Minor update today. Though it's a comic, this is not a 4Coma. It is not a tutorial. It doesn't even have to directly do with Detective Conan. What is it?
It's kind of big, so you'll have to view it at dA
WHAT WILL BE THE CONCLUSION!? Find out after I have a shower and visit with my sister! ...So in a few hours or so <3 [/torture]
-
Conia

- Yurikochan's Husband
- Conan Shuuichi
Posts: 5194
Re: sonoci's drawings and such
OMG THAT WAS AWESOMEEEEEEEEEEEEEEEEEEEVNEIUFVNIJSDOCXKOAS <333333333333333333333333333333333333333333
Spoiler:

